
Correct Post Installation for the Longevity of Your Fence.
Ordering a two, or three-rail Post and Rail kit from The Wood Project means that your new fence will arrive milled, morticed and ready to prepare for installation. Before you start installing your fence, be sure to check out our Post and Rail Preparation Guide to maintain the longevity of your fence once it’s in-ground.
Installing Intermediate Posts
The height of your fence will differ depending on whether you have selected a two or three rail fence. We supply our posts at 2m for a three-rail fence that incorporates 200 x 50 rails which allows for 650mm in ground and 1350mm out of the ground. The height at the top of the rail will be 1200mm.
We supply 1.8m posts for 3 rail fence that incorporates 150x50 rails which allows for 600mm in ground and 1200mm out of ground, the height of the top rail will be 1050mm
For a two-rail fence, we supply posts at 1.8m which allows for 600mm in ground and 1200mm out of the ground. The height at the top of the rail is 1050mm – this is the case for 200x50mm rails and 150x50 rails.
Dig your holes to suit and place approximately 6in of aggregate in the bottom of the post-hole to allow for drainage. Using the dirt from your hole, mix with a 1/2 bag of cement, then fill half of the hole before compacting (using a crowbar for example).
Fill your hole to the top with the remainder of the cement mix and compact again.
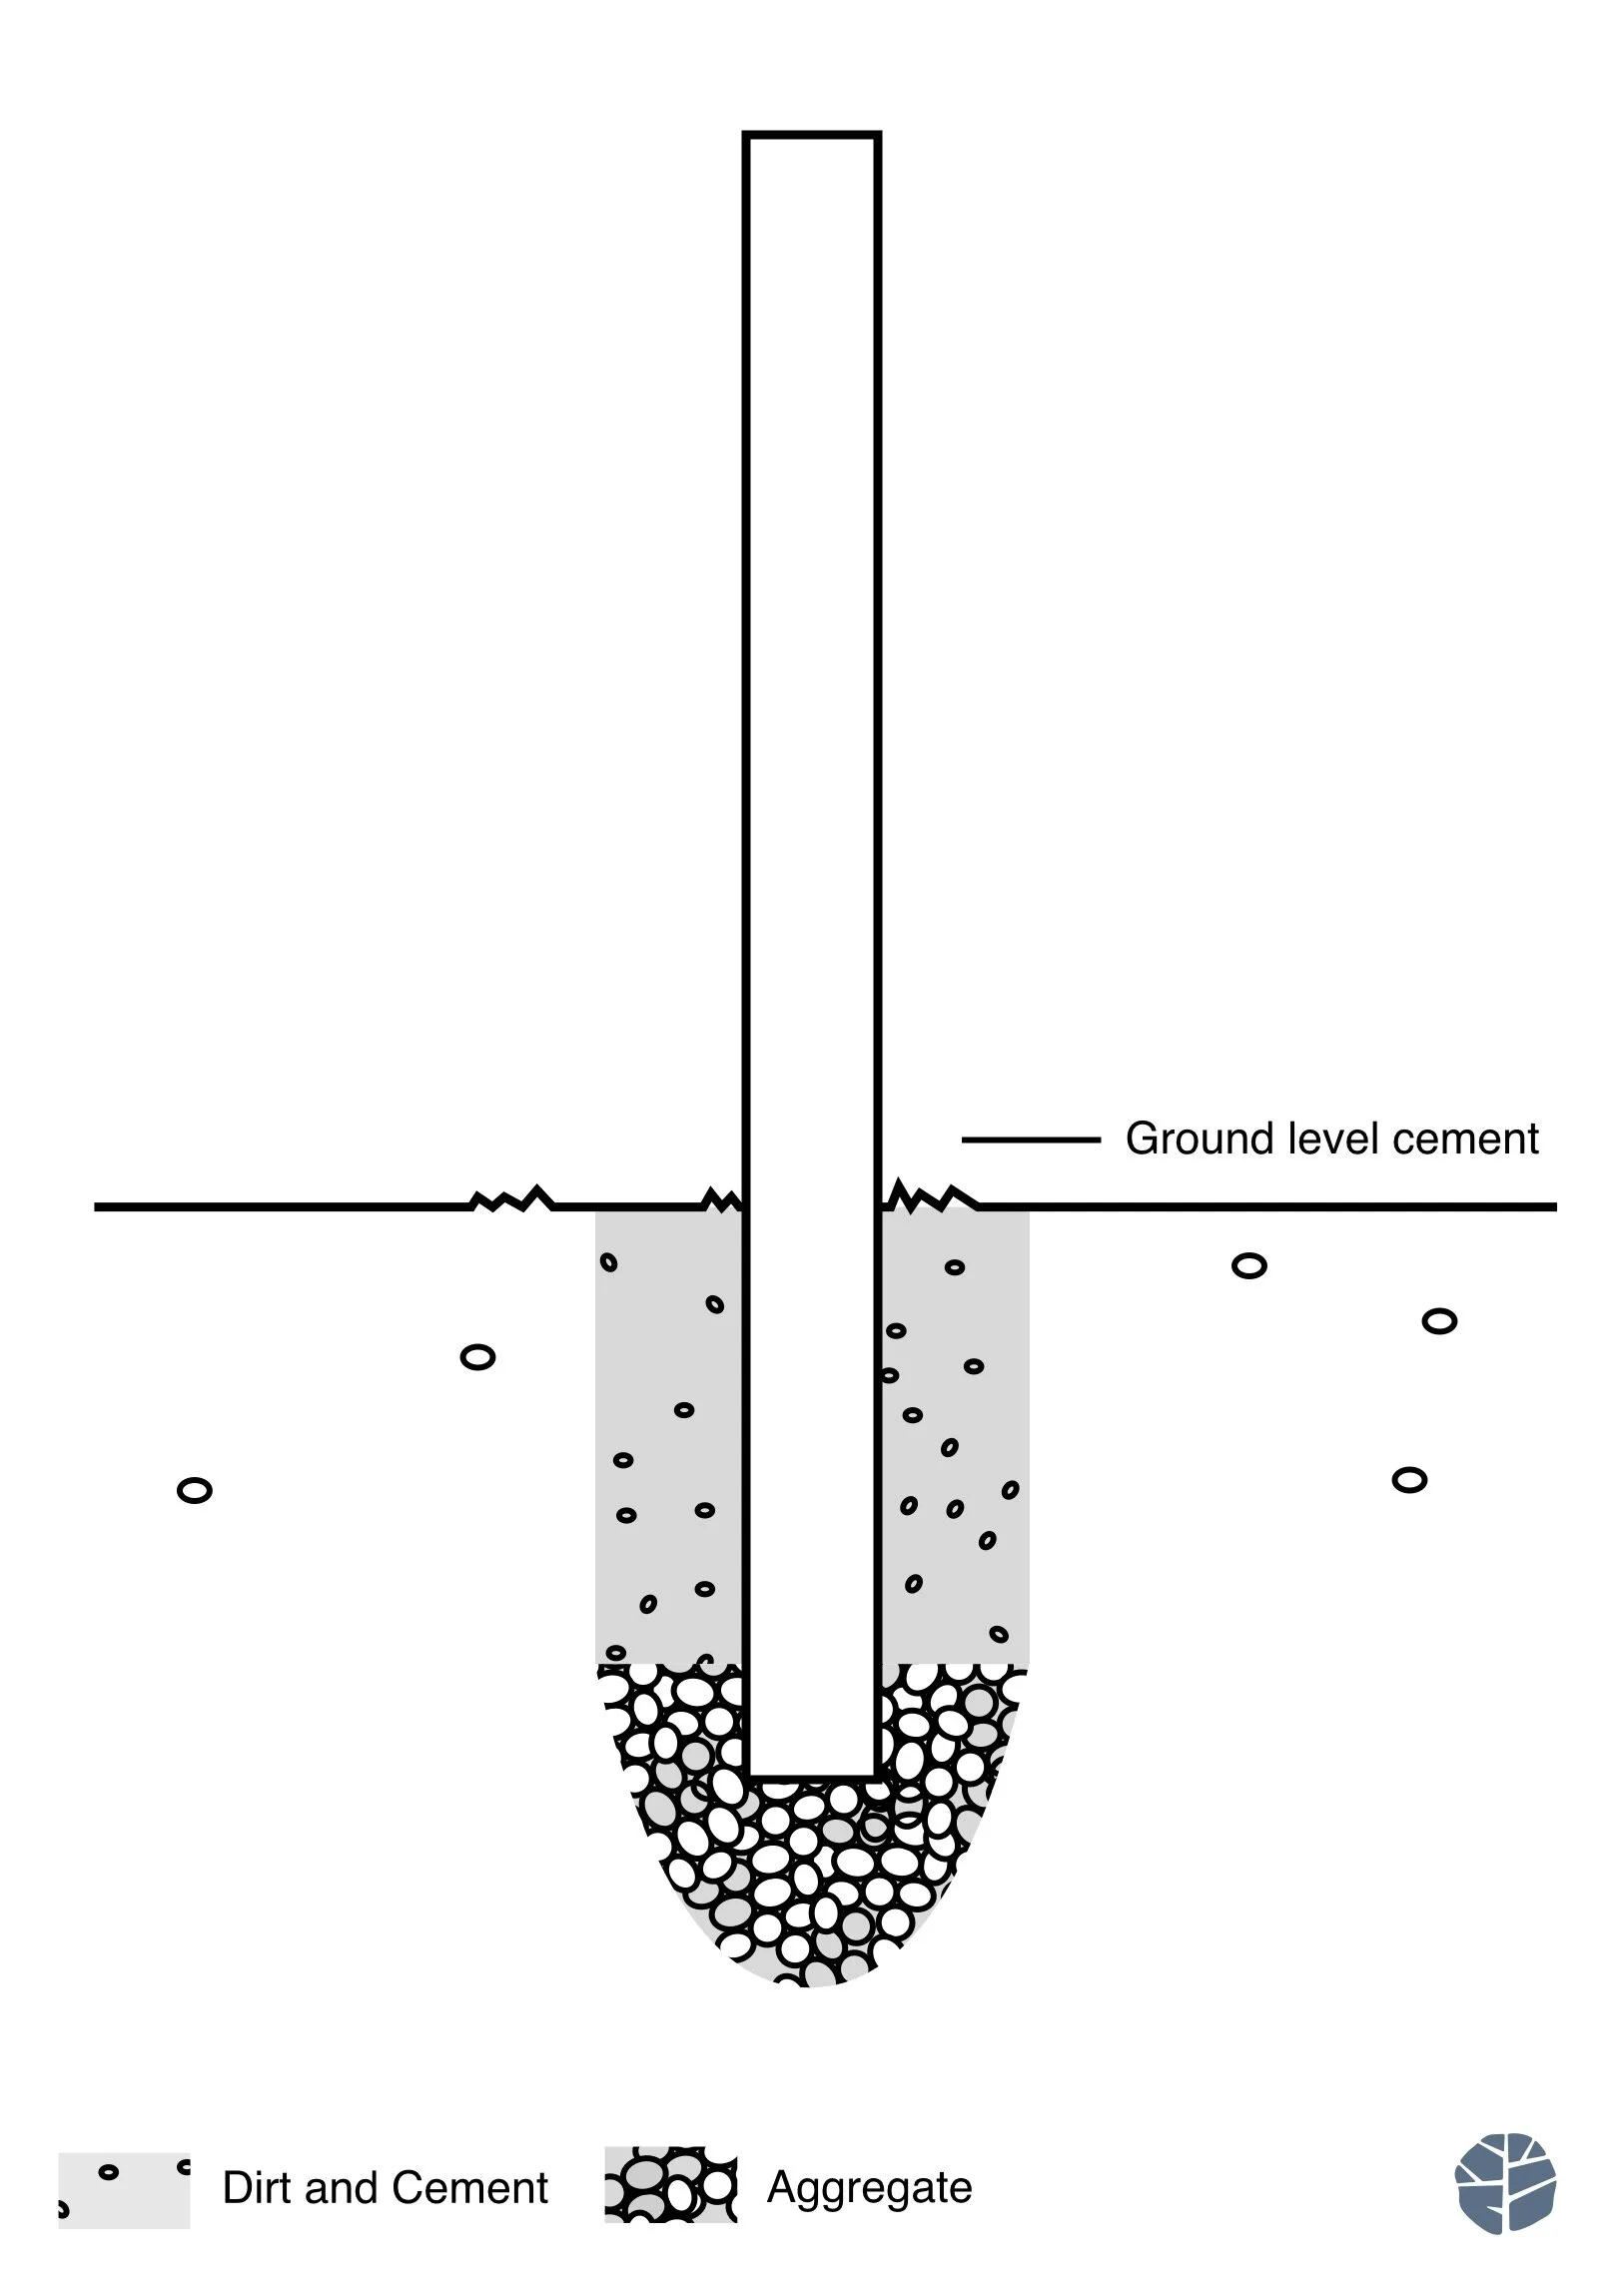
A diagram showing how to install your intermediate posts
Installing Gate, End and Corner Posts
We generally supply our gate posts at 2.4m for a three-rail fence that incorporates 200x50rails and 2.2m for a three rail fence that incorporates 150x50 rails, to allow extra in-ground depth. For a two-rail fence, gate posts will need to be 2.2m (for both rail options). As a guide, we suggest allowing 1m in-ground for your gate posts.
Dig your hole to suit and place approximately 6 inch of aggregate in the bottom of the post-hole to allow for drainage. Place in your post, and this time you will need to use general-purpose cement only (not the dirt/cement mix as above). Follow the directions on the cement packaging.
Be sure to come only slightly above ground with the concrete and create an angle for the cement (see below diagram) toward the ground level. As timber dries, it shrinks slightly but concrete does not. Without this technique you may be left over time with a gap between the concrete and the post. By angling the concrete away from the post and coming just above ground level, it will ensure water does not get trapped between the post and concrete.

A diagram of how to install your Corner or Gate posts
Installing your Rails
Your rails should be trimmed to length. As the fence is being installed, making sure you coat the ends of all your rails (using fence paint or oil) before slotting them into your posts. Simply slide your rails into the posts.

How our Post and Rail kits are packaged up and delivered